-
Notifications
You must be signed in to change notification settings - Fork 1
remo²hbo Workshops
This is a how-to for a workshop that was first held at the re;publica 2019 in Berlin. The audience was expected to be tech newbies, and the implementation of a temperature sensor is a great way to depict the mix of electronic devices with software components on a low level while addressing its potential complexity at the same time.
- Raspberry Pi 3 or Raspberry Pi with Bluetooth
- SD card with oktopus_boot image (available here) -> if you have more than one phone and Raspberry Pi, i.e. you want several participants to connect each with a Oktopus computer, you should change the hostname of each SD-card image befohrehand on your laptop.
- 4.7k ohm resistor
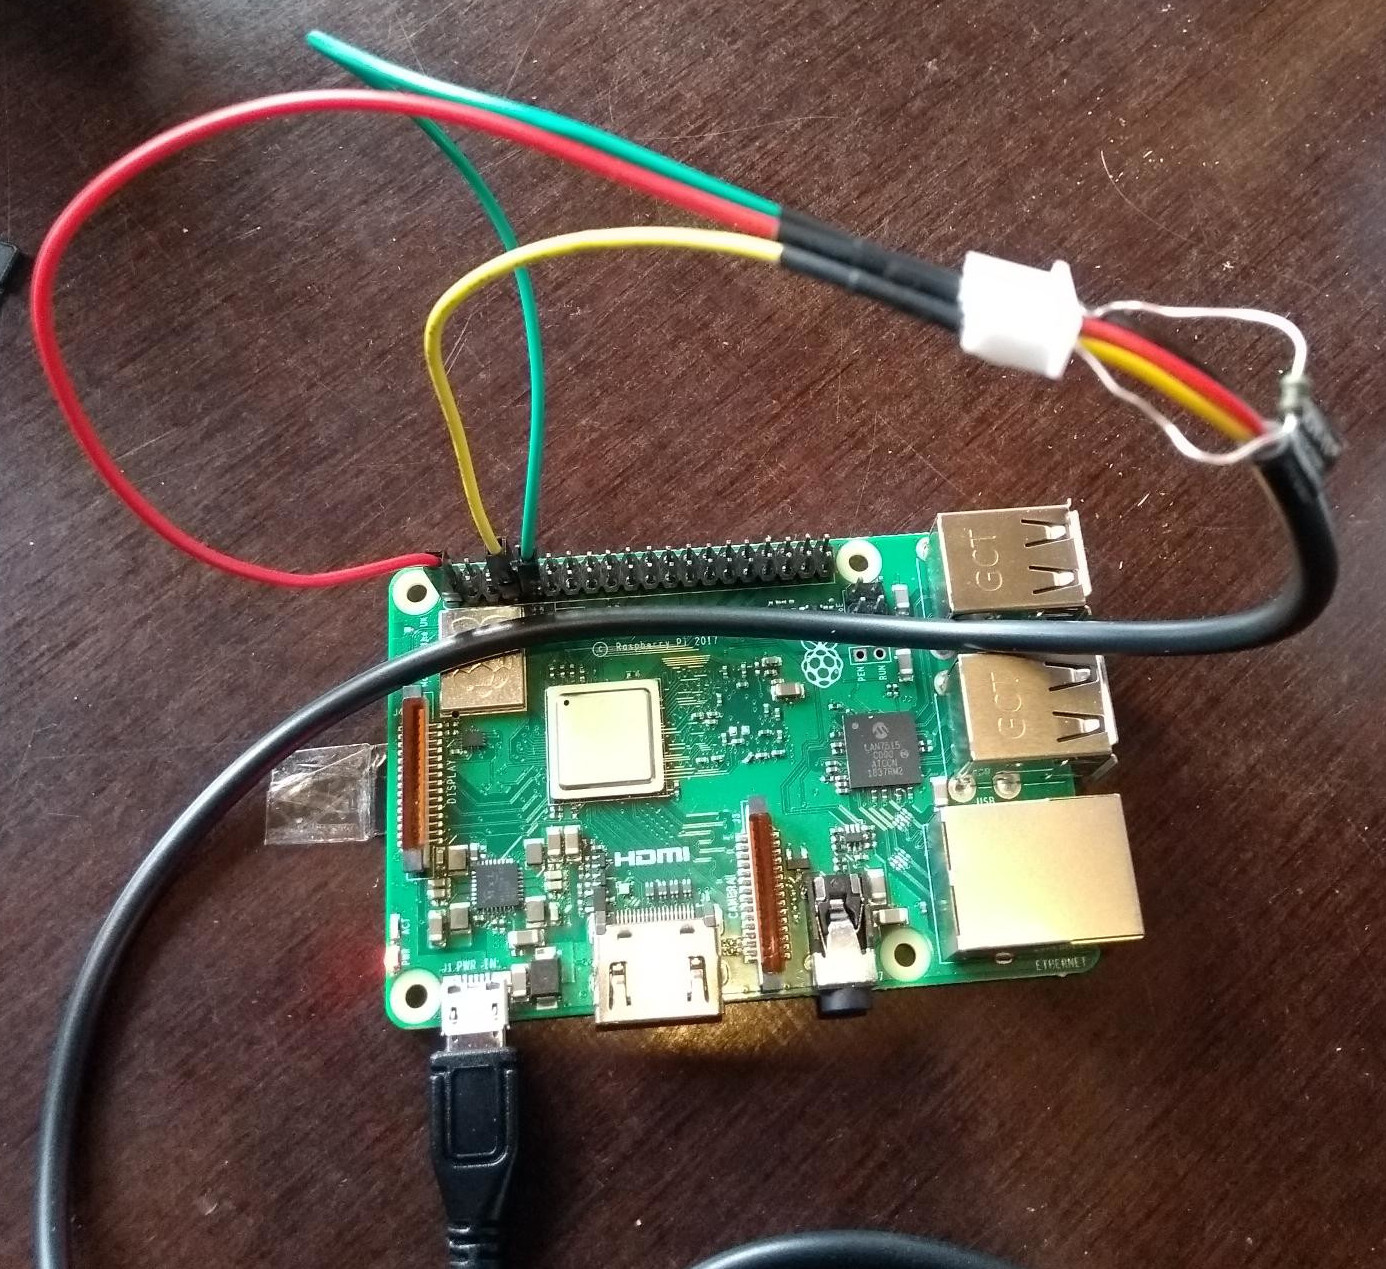
- 3 jumper cable (ground (green), electricity (red), signal (yellow))
- Temperature sensor (LinkerKit LK-Temp2)
- Power supply
- Smartphone

Put SD-card with image into the Raspberry Pi. Now, attach the jumper cables to the GPIO (general-purpose input/output) pins on the Raspberry Pi accordingly:
Now attach the 4.7k ohm resistor between the signal cable (yellow) and the electricity cable (red).
The power supply between Raspberry Pi and outlet can now be attached.
Finally, the participants can now connect their smartphone (one per Raspberry Pi) to the Raspberry Pi via Bluetooth:
- Disable Wifi on your phone!!!
- Enable Bluetooth (WATCH OUT: make sure that you have enabled Internet connectivity via Bluetooth. Some phones do this automatically, some require an extra selection to be made) and connect with Oktopus.
- Enter http://oktopus in your phone's browser.
The signal display will now appear on your phone. The temperature should appear and can be changed by grasping the sensor into your hand.
