-
Notifications
You must be signed in to change notification settings - Fork 0
Mqtt Iot English
- About application
- Setup the connection
- Adding metrics
- Autogenerate metrics
- Deleting and sorting metrics
- Charts settings
- Groups settings
- Unlock the full version of the application
- Feedback
Application Mqtt Iot is developed for easy work with a MQTT broker and your IoT devices.
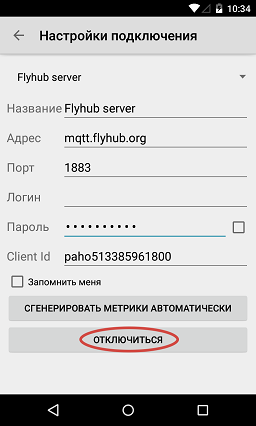
When you first start the application, you must configure the connection to your Mqtt server:
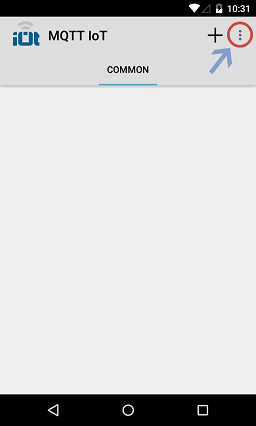
- Press the "Menu" button in the upper right corner of the screen.
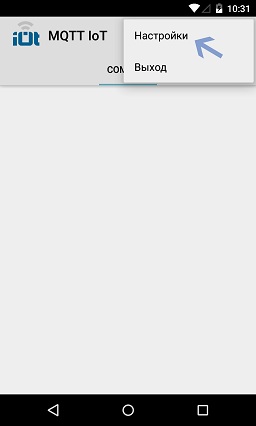
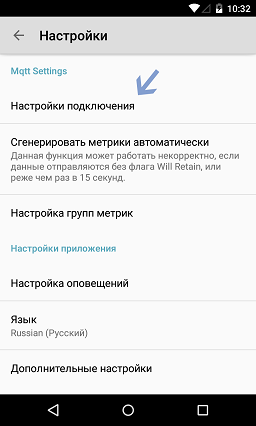
- Select the "Settings" item.
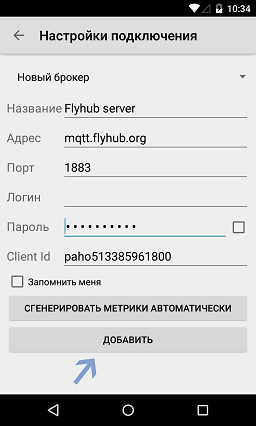
- Select the "Connection Settings"
- Enter the connection information.
- Click the "Add" button, then press the "Connect" button.
- When the connection is successful, you should see "Disconnect" button, if you connect an error occurs, check the entered data, as well as internet connection and Mqtt server.
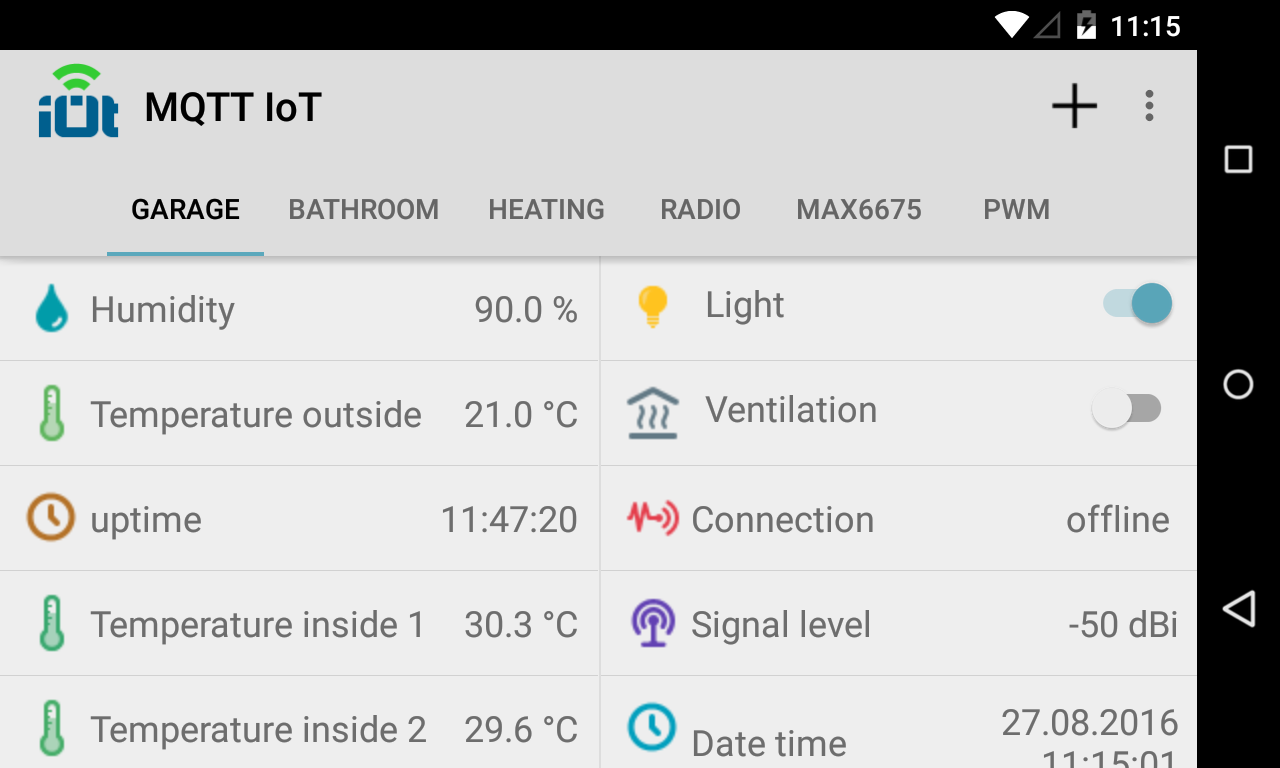
Metric - this item displaying and/or changing the value of a topic. To add a metric, click in the upper right button "+".
Main fields:
- Name - the name of the metric, who will be displayed in the list of metrics.
- Group - specifies the group to which the given metric belongs (how to add a group, see below).
- Topic - the topic on the server
- Retained - if this flag is set, the message from this metric will be sent with a flag Will Retain, this flag means that the server will store the last sended value, and when you subscribe to this topic, it will return.
- Subscribe to push notifications - if the flag is set, then the minimized application, you will receive a push notification about changes in values in this topic.
- Keep history - if this flag is set, then all the values that come into this topic will be saved in the phone's memory, to these values you can view the chart. (Learn more about charts, see below)
- Type - specifies the type of metrics. Currently the following types are available::
- Switch
The switch can take two states, ON and OFF, suitable for relay control, light, etc.
- Slider
The slider allows you to set the value of the range, you can specify minimum, maximum values, as well as a step.
- Readonly Value
Meaning simply displays any values that come from a topic, if the metric is created with a flag of "Smart Value", then with the arrival of data from a broker, the data can be converted, for example, if the topic title contains the text of the uptime, it is assumed that it is specified in seconds, and It will automatically be converted to days/hours/minutes/seconds format.
- Input
The input field allows you to send an arbitrary value in a given topic.
- Button
Button sends preset value in the topic, when you click on it.
- Indicator
The indicator is similar to a switch, shows the value of OFF and ON, but you can not send value to the topic, only see..
- Meter/Scale
The scale displays the value of the topic on a beautiful scale , you can specify minimum and maximum values of the scale , as well as the color template.
For automatic generation of metrics need to go to "Settings", then select "Connection Settings" and click "Generate metrics automatically." Autogenerate works only for topics, the values of which are stored on the server (so that the value stored on the server, your device should send data with a flag Will Retain)
To delete a metric, click and hold on the specify metric, then in the dialog select "Delete"
To sort the metrics, click and hold on any metric, then click Sort. The icon (three horizontal lines) will then close with metrics, click on it and drag the metric to the desired position. After sorting is complete, press the "Save" button in the upper right corner.
To see the chart for a specific metric, you need to edit the metrics, or add new metric with checked "Keep history (for charts)" checkbox, and then save the metric. Then press and hold on the metric for which you specify the "Keep history", and select "Show graph".
To dividing metrics on logical blocks, use the groups of metrics. To add a new group of metrics, go to "Settings" and select "Configure groups of metrics." On the screen that opens, you can edit, add, and change the order of groups.
- To add a group, press the "+" button in the upper right corner.
- Group name - the name that will appear on the main screen.
- Group code - code that is used to identify the element of the group in generating metrics. (example mqtt.example.com/[email protected]/group-code/bmpt, group-code - is a group code)
- To edit the name of the group or delete a group, tap and hold on the group until a context menu will showed, select the action "Remove". The group name as well, you can change the home screen, press and hold on the name of the group (tab) until you see the window for editing group name.
For simultaneous display of multiple groups on one screen, go to "Settings", then select "Advanced settings".
- To change the number of visible groups only in the horizontal orientation - set checkbox "Amount of visible groups will change only if the application is in landscape orientation" to checked.
- The amount of visible groups - sets the amount of visible groups of 1 to 4.
To unlock the full version, go to "Settings" and select "Buy full version".
Slack: https://flymon.slack.com Channel: mqtt-iot_ru
IRC
Server: irc.forestnet.org
Port: 6667
Channel: #mqttiot
Web Client: http://chat.forestnet.org (to the Channels field enter #mqttiot)
