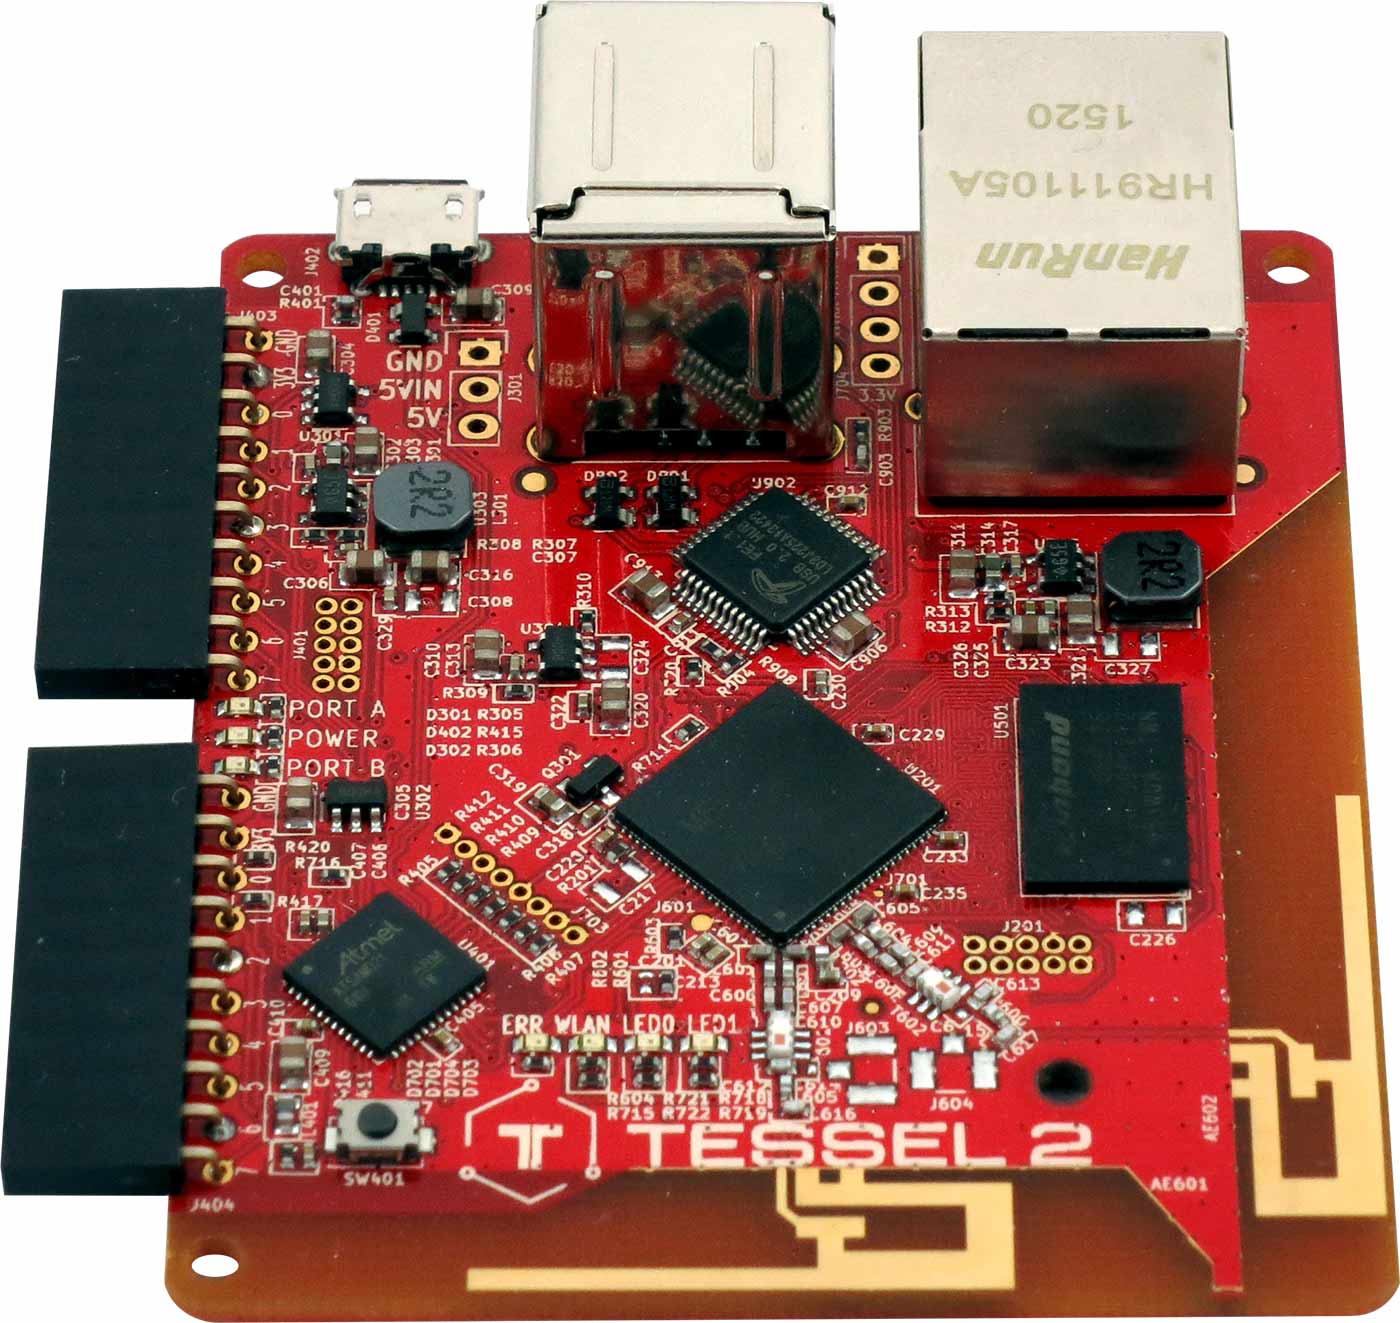
- Use javascript and node to control hardware
- http://nodebots.io/
- Microcontroller hardware
github.com/nodebots/nodebotsday
--
- A microcontroller that runs javascript
- Node built-in
- USB, Ethernet, WiFi
- Two General Purpose I/O Ports (GPIO)
- Lots of plug-in modules -- * accelerometer, climate, ambient, IR, servo, RFID, etc.
- t2 Command-line Interface
- https://tessel.io/
We have already installed node.js and used npm to install the t2 CLI for you. If you are at home you need to go to https://nodejs.org/en/ and install node. Then, at a command prompt, npm install t2-cli -g to install the t2 command line tool globally on your computer.
Get familiar with the t2 command:
- Open a command prompt
Start+Run cmd - Change directory to dev directory
cd \dev- Make a tessel directory
mkdir tessel- Change to the tessel directory
cd tessel- Plug in your tessel via micro USB cable (wait 30 seconds for it to boot)
- Search for tessels
t2 list- Name your tessel
t2 rename *whatever*- Search for your tessel
t2 list- See what version of node your tessel has
t2 version –n *whatever*- Connect your tessel to WiFi
t2 wifi –n caa-guest- Setup secure communications
t2 provision- See all the t2 commands
t2Usage: t2
- command
- install-drivers | Install drivers
- crash-reporter | Configure the Crash Reporter
- provision | Authorize your computer to control the USB|connected Tessel
- restart | Restart a previously deployed script in RAM or Flash memory (does not rebundle)
- run | Deploy a script to Tessel and run it with Node
- push | Pushes the file/dir to Flash memory to be run anytime the Tessel is powered
- erase | Erases files pushed to Flash using the tessel push command
- list | Lists all connected Tessels and their authorization status
- init | Initialize repository for your Tessel project
- wifi | Configure the wireless connection
- key | Manage ssh keys for connecting to a Tessel
- rename | Change the name of a Tessel to something new
- update | Update the Tessel firmware and openWRT image
- version | Display Tessel's current firmware version
- ap | Configure the Tessel as an access point
- root | Gain SSH root access to one of your authorized tessels
--
- Make a directory for your project
mkdir blinky- Change to your project folder
cd blinky- Initialize a Tessel project
t2 init- See what was created
dir- Edit your project. Open the sublime editor (Start+Run sublime), open the project folder c:\dev\tessel\blinky
- Look at the index.js file (click index.js in file list on the left in sublime)
// Import the interface to Tessel hardware
var tessel = require('tessel');

// Turn one of the LEDs on to start.
tessel.led[2].on();

// Blink!
setInterval(function () {
  tessel.led[2].toggle();
  tessel.led[3].toggle();
}, 100); // every 100 millseconds (1/10th of a second)

console.log("I'm blinking! (Press CTRL + C to stop)");- Run your project on your tessel
t2 run index.js- Open a git bash window
- Change directory to the tessel dev directory
cd \dev\tessel- Download the materials
git clone [email protected]:gdibble/caa-nodeTraining.git- Change directory to open of the project folders
cd caa-nodeTraining/node-audio- node-activate-light: Make something happen when the lights come on
- node-activate-sound: Make something happen when a sound is heard
- node-audio: Read some text and/or play an mp3 file
- node-climate-tracker: Graph relative humidity and temperature on webpage
- node-pet-sleeptracker: Activity tracker which sends a text message + posts to webpage
- node-websitedown-alarm: Monitor a website and send a text message if not unreachable
--
- http://github.com/gdibble/caa-nodeTraining | you can also download this repo or clone with git using:
git clone https://github.com/gdibble/caa-nodeTraining.git
- http://www.nodejs.org
- http://www.sublimetext.com/
- http://www.w3schools.com/js/
- http://www.codecademy.com/
- http://nodebots.io/
- http://tessel.io/start | Tessel 2 Get Started
- https://github.com/rwaldron/johnny-five | A JavaScript Robotics Programming Framework for Arduino and other hardware
--
Made with ♥ by CAA


